DIY Lighting Page 2
6" Polarising Effects wheels for Projection
| Now Discontinued by Opti, here is how to make your own effect wheels. (you need two motor plates, one rotating at 0.5rpm and one at 15 to 20 rpm) and of course a suitable projector like Solar250/K series, or modified Tutor II. You also need a polarising spinner, this is simply a polarising film between two glass plates attached to the 15/20rpm motor, and placed nearest the focus lens (or even after the focus lens for say a Tutor II or Pluto projector)All together you will need 2 cut circles of 1.5mm glass, a polarising filter sheet,center boss and rubber ring for the spinner. 2 cut circles of 1.5mm glass, a polarising filter sheet,center boss and rubber ring, some cello tape (Scotch tape) for the effect wheel. Two motor plates or motors, one rotating at 0.5rpm, one rotating at 15 to 20rpm. | |||
| CONSTRUCTION METHOD | |||
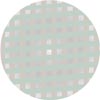
| 1. Start by cleaning and polishing your glass. Place one glass on a clean surface and stick strips of tape across the glass, leaving gaps between each piece of tape. Remove all air bubbles under the tape. | 2. Next, repeat the process, laying tape at roughly 90 deg to the original. Again remove all air bubbles. You should have a cross hatch pattern similar to that shown on the right. | ||
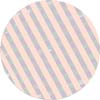
| 3. Now apply another layer of tape, partially covering the glass area with no tape. Apply this layer at an angle of 30 to 40 deg as shown on the right. This can be your last layer of tape or you can add another as shown in the next step. | 4. If wish another layer of tape strips can be added. Place these at a similar but opposite angle to those in step 3. This should result in the formation of small triangles on the glass with tape strips running in different directions. | ||
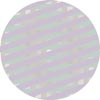
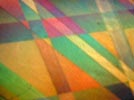
| 5. Final assembly. Place your sheet of polarising film over the now completed back glass. Over this place your top glass. Fit the boss to THIS side for Opti projectors.(if the motor position if different for other projectors, fit boss to other side) Fit rubber ring. Job done! | 6. To create the polarising spinner, simply place your filter between the two cut glass circles, fit a rubber and a boss for attaching to the motor. The resulting projected image should be similar to that shown to the right. | ||
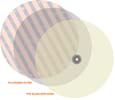
| As these wheels are highly individualistic, the final image depending on tape angle, tape width, number of strips and gap widths, experimentation with these variables will produce different final effects. Clicking any of the images in the 1 to 5 sequence will load a new page showing a composite image of all steps. Be patient as the image is large, it may take a while to load depending on connection speed. | |||
| Other wheels can be created in a similar fashion, such as those similar to the Opti 'shred'. You will need the polarising 'spinner' made previously for all polarising effect wheels. To create the 'shred' wheel you complete the steps as previously above, but without the scotch tape. Instead of the scotch tape, obtain some cellophane (clear), this is found on lots of food wrapping, on new cd roms, gifts etc. Using an office shredder or a mad person with scissors. Shred or cut a quantity of cellophane into fine thin strips about 2 to 3mm wide. They do not have to be straight or even, just chopped up. Randomly place these at all angles across the glass. Scrunching the strips adds to the effect. After leveling the mass of strips out a little, place the polarising film on top, then the top glass. Trim off strips sticking out of the 'sandwich' and fit the rubber ring. Fit to your projector and marvel at your hand crafted results. | |||
NOTE for any of these effects to work, the light must pass through polarisors in the correct sequence. The sequence is: Light source - polarising filter - modification film (cello tape,cellophane etc) then polarising film again. Depending on your projectors motor position, if the effect does not work, you have the motor mounting boss fitted to the wrong side of the glass. The examples above assume you fit the effect wheel to a motor plate in the position nearest the light source lens in the gate of the Solar projector. |
|||
| Previous Page | Return to Section Main Page.. |
||
A note about copyright......I have tried to find publishers or anyone i can get, but some of this content is very old now. If you see your work here and it's an issue, contact me. I will either change, acknowledge or remove it. (site policy here)
Copyright © M.Ginda 2022

