RANK ALDIS TUTOR II -------------UPGRADES AND MODIFICATIONS
Mods to the Tutor II are always welcome, and detailed here another of the more common mods to make this workhorse better.
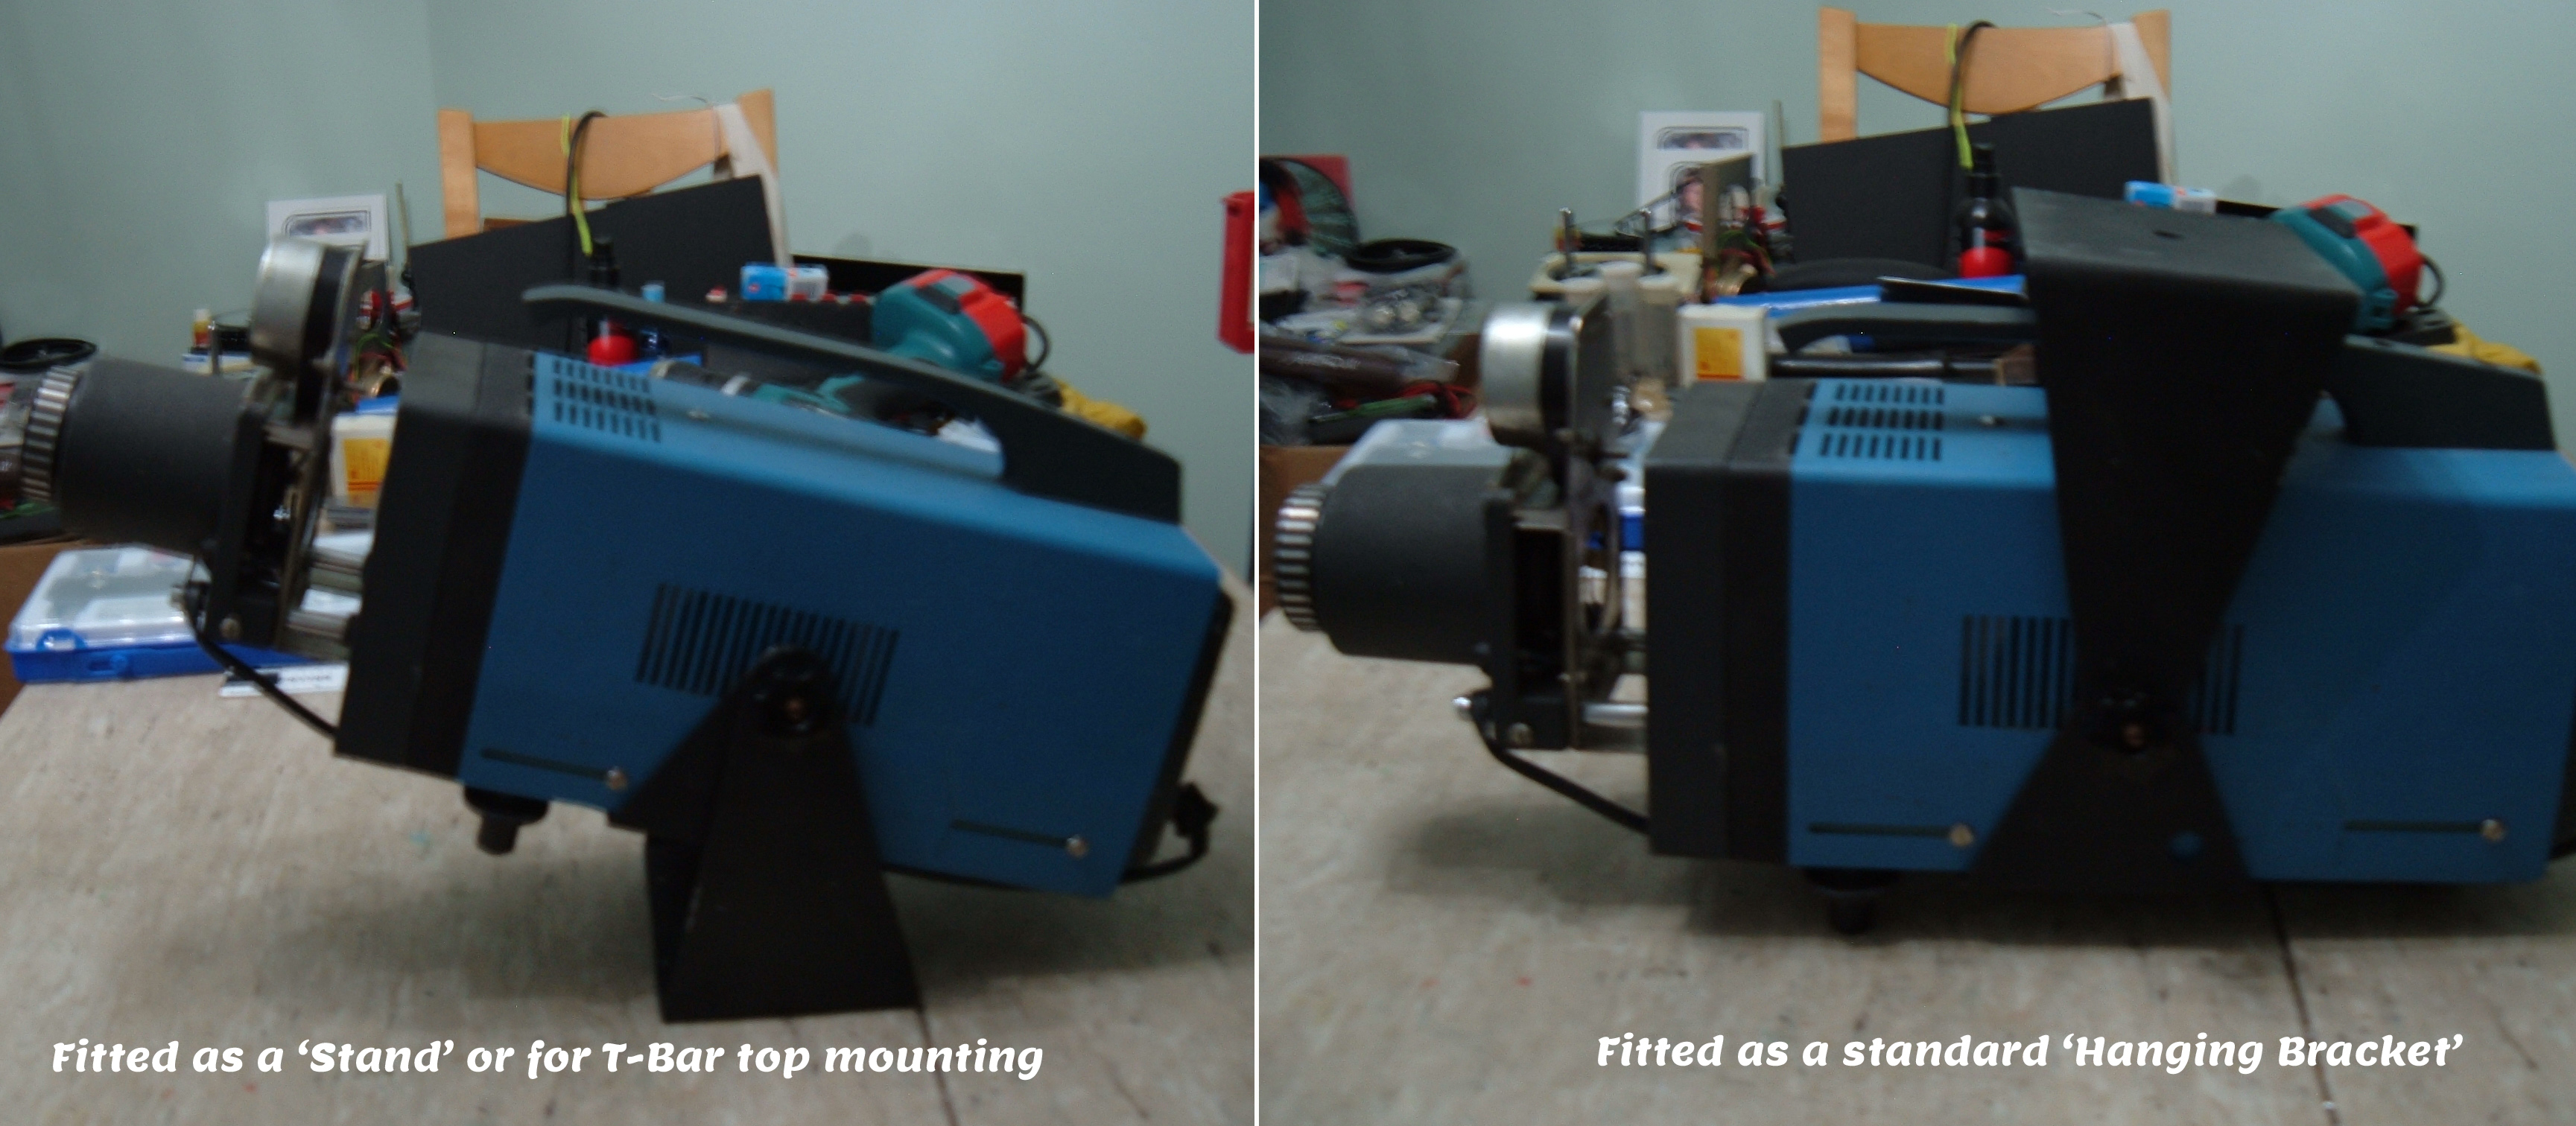
******FIT A HANGING BRACKET, make your own using simple tools*****
This project needs to fulfill some basics. The design allows the bracket to affix to a lighting rig, either ontop or below the bar, standard clamps can be attached or the usual bolts used. The bracket can be moved to the underside and be used as a stand. The bracket position is close to the projectors center of gravity so the least force is needed to lock the bracket position. Facilities for safety chains can be utilized in this project. Construction can be attempted by anyone with a little metalwork experience. I made the prototype on the dining table - so it can be done folks.
This project will need a few tools, holes are preferably punched but drilling is ok. a vice would be handy and a good metal saw if you don't have a guillotine in your armory. Soldering/welding if you can but if not some really good epoxy (like JB Weld, or similar) + gen tools like screwdriver, file, abrasive sheet, drill bits and drill. Paint to finish and protect (harder the better, your colour choice) Ok so the parts required are shown next. Not shown is the sheet metal used = 1 to 1.1mm thick steel or galvanized steel (alloy is too 'soft') |
|||||||
 |
 |
 |
 |
 |
 |
 |
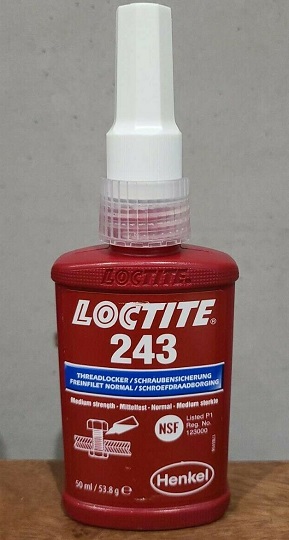 |
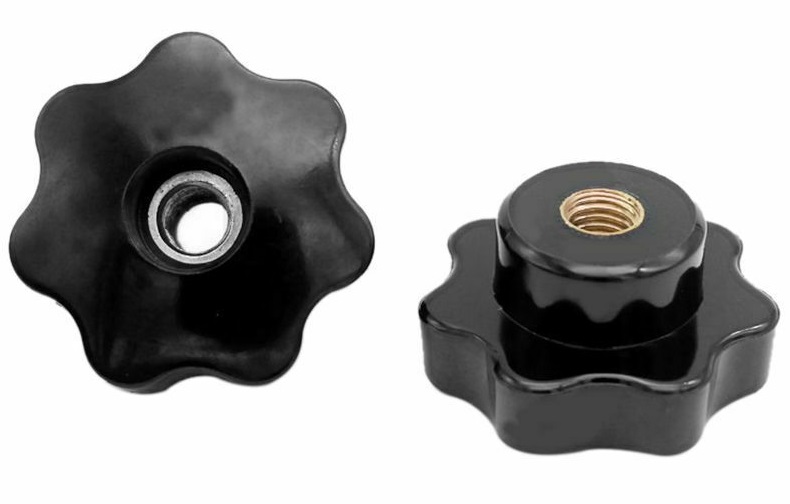
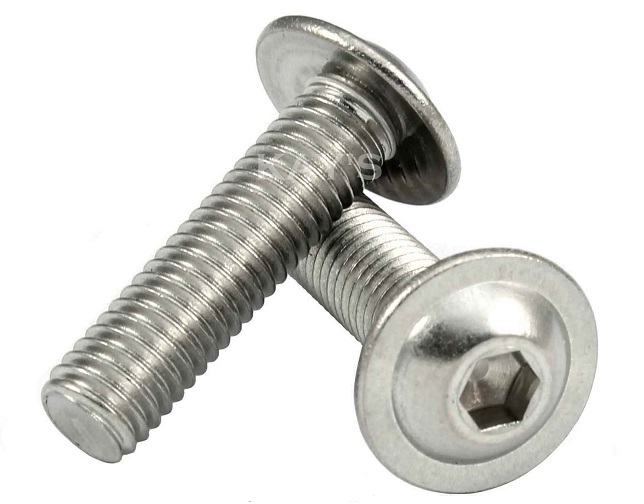
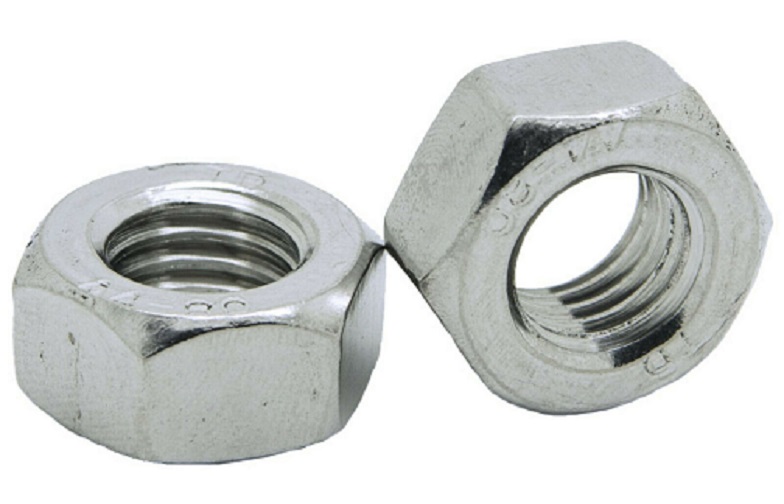
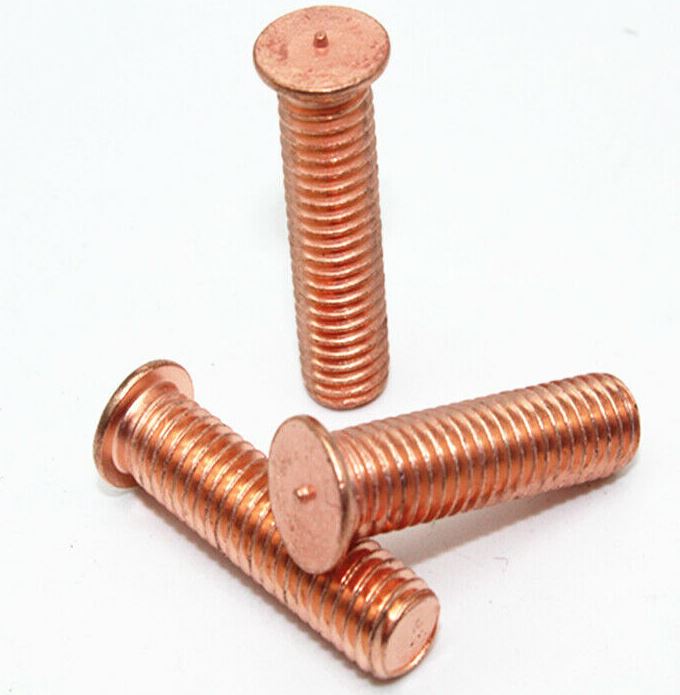
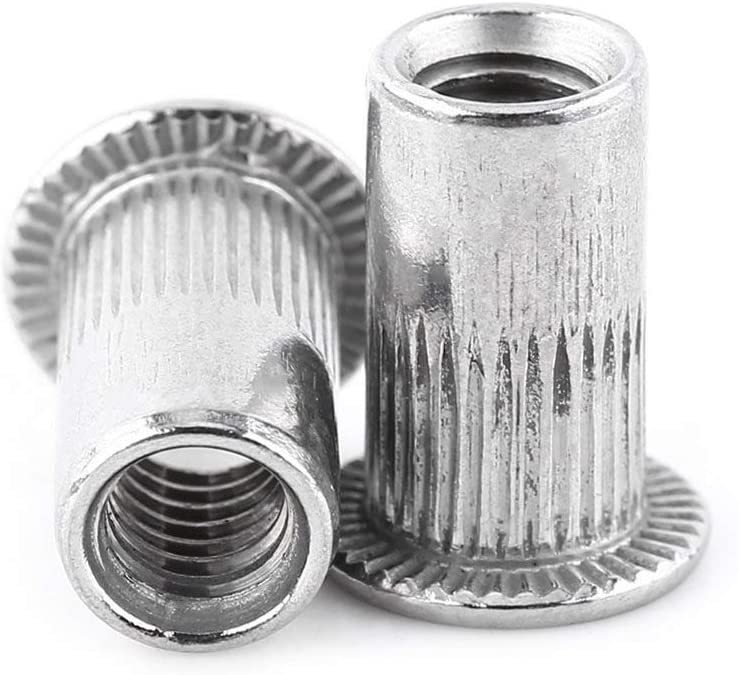
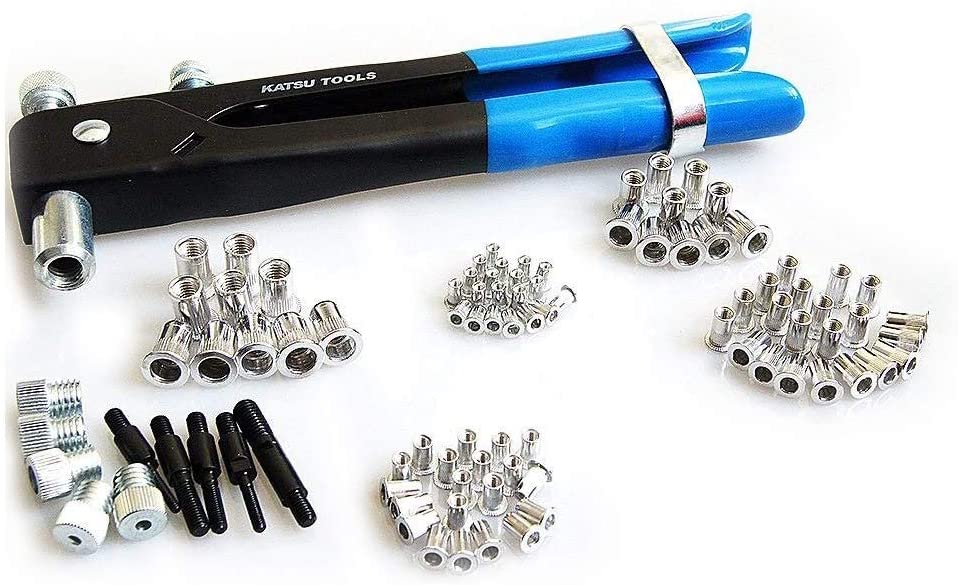
| Female thread 7 lobe through hole clamping knob | M4 x 20 Flanged stainless bolt | M5 Full nut stainless or 8mm m4 spacer | M6 copper plated stud welding screw 25mm | Rubber penny washer with glue | . M4 'Nutsert' | Nutsert kit, handy cheap tool inc nuts | Loctite 243 or similar |
MAKING THE BRACKETS AND PREPARING THE PROJECTOR |
||
 |
 |
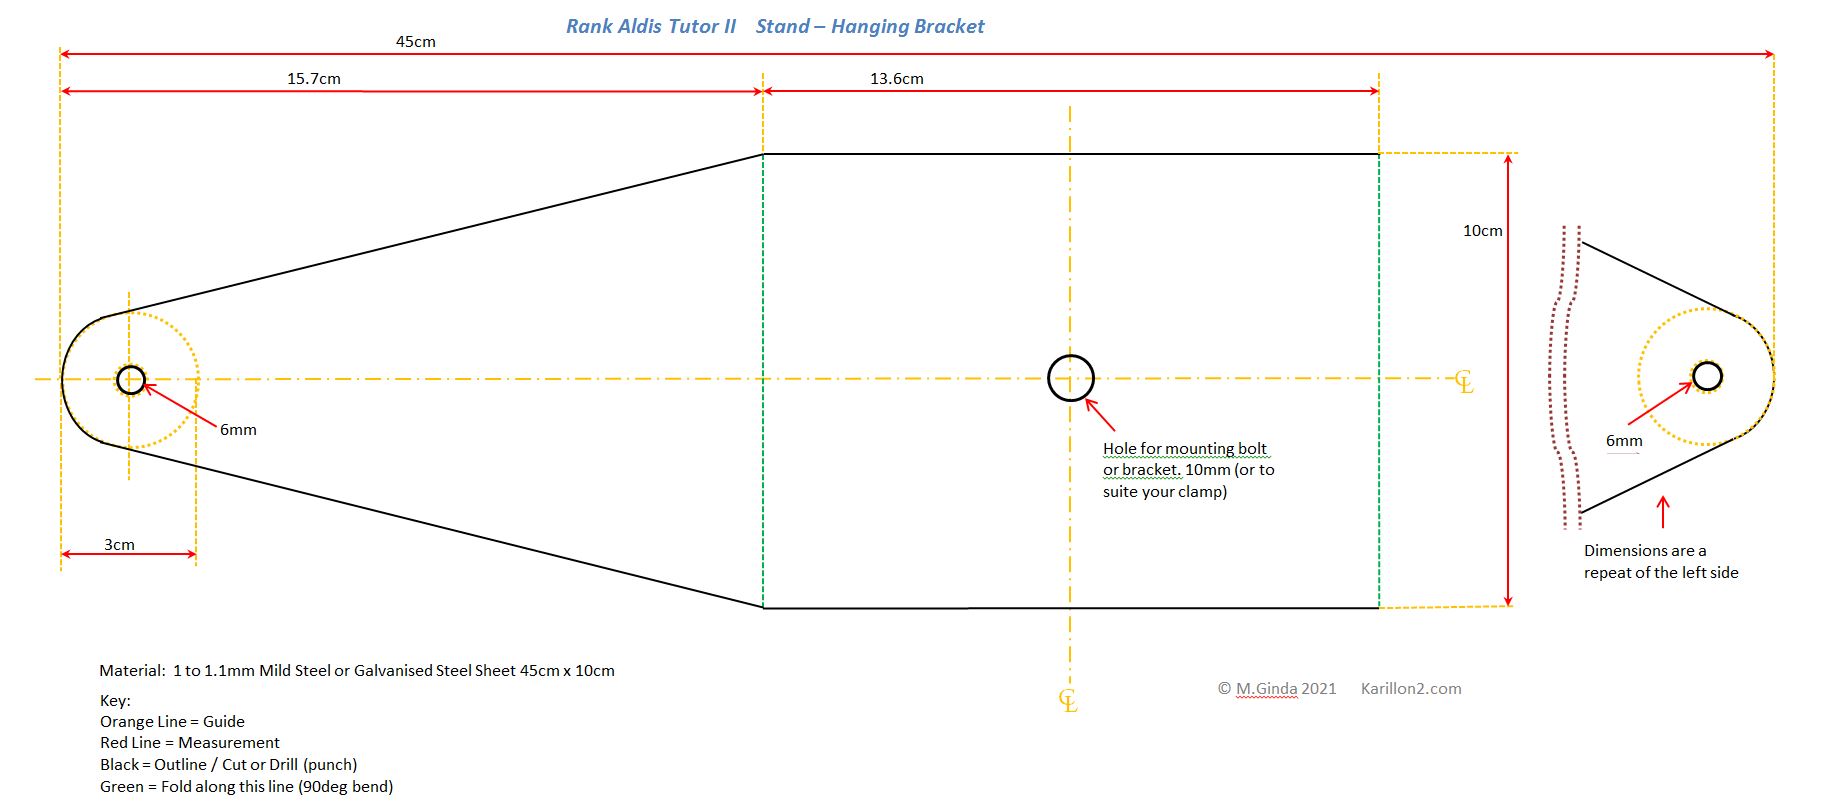 |
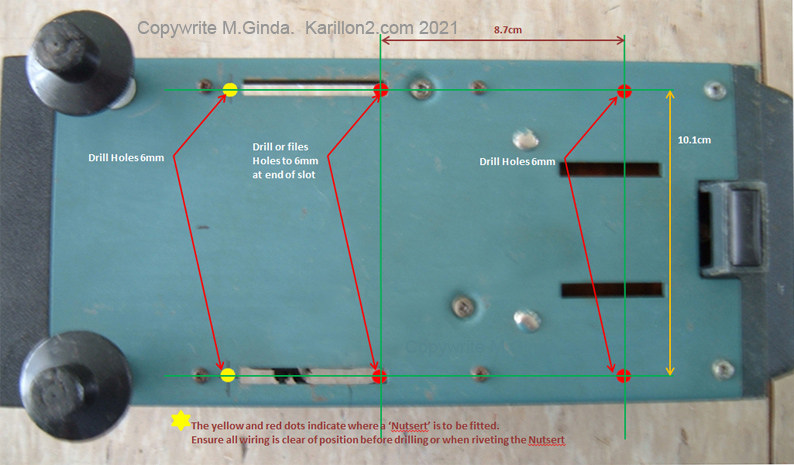
| Drill positions for the 'nutserts' Click for larger image in new window | . Dimensions for the lower bracket. This fixes to the bottom of the projector when completed. Click for a larger image in a new window. | . Dimensions for the main stand bracket. No assembly just cut drill and bend. Click for a larger image in a new window. (This can also be used on an Opti Solar250) |
| ---- -------------------------------------------------------------------------------------------------------------------------------------------------------------------------- ---- | ||
To prepare the projector, carefully mark out and drill the 6mm holes, the two nearest the rear foot are optional for fitting an eyebolt to enable safety chains/straps to be easily attached (M4 threaded eyebolt). The two positions at the end of the slots can be drilled or made with a small round needle file. When drilling ensure any cables are clear of the hole position (it also goes without saying that the power is disconnected!!). When completed (de burr not required) use the nutsert tool to crimp a 4mm nutsert nut into each hole, how to use the tool is in many you tube videos or in the kit instructions. The kit will have some 4mm nutserts included and are cheap at around £13.00 or $17.00 and you will use it again! The 1mm steel can be bought from a host of suppliers and many will guillotine cut the material to size (square) leaving you to saw or tin snip the angles. Mark out then Punch or drill all holes, ensure you de burr all the holes if drilling, now you can do the 90deg folds. Folding can be done in a vice, or by clamping to a hard edge with mole grips and tapping down the joint after pushing over, or use a couple of angle iron pieces etc, better if you have a press and v block of course but these are expensive. I tried all methods and the v block is best but hand bend is acceptable if done carefully. Next up fit the M6 stud welding screws through the 6mm holes of the lower bracket such that they protrude outward. These are chosen for having little 'head' but you could use ordinary bolts with the head filed down (so as not to hit the projector casing). It is best if you mig weld these in place on the inner side, or solder with hard plumbers solder. But if not possible fix in place by applying some good quality epoxy over the head and onto the metal, the size of a washer and about 3mm thick, use a good slow set type such as JB Weld or similar. When set you should mask the stud threads and apply a good quality paint finish (do the usual prep- rub down degrease etc). Also paint the stand bracket. Place 4 metal spacers or 4 M5 full nuts over the mounting holes on the projector base, then carefully place the lower bracket atop these and fit the 4 M4 x 20 flanged bolts. Use Loctite on the threads of the flanged bolts and tighten al 4 bolts. The spacers are to maintain airflow to the two slots that are positioned under the lamphouse. You can now fit the two rubber washers over the threaded bolts and allow the backing glue to fix the to the bracket surface. Once done the main stand bracket can be applied and the clamping knobs spun on to allow the fixing of tilt positions of the finished stand. |
||
 |
I 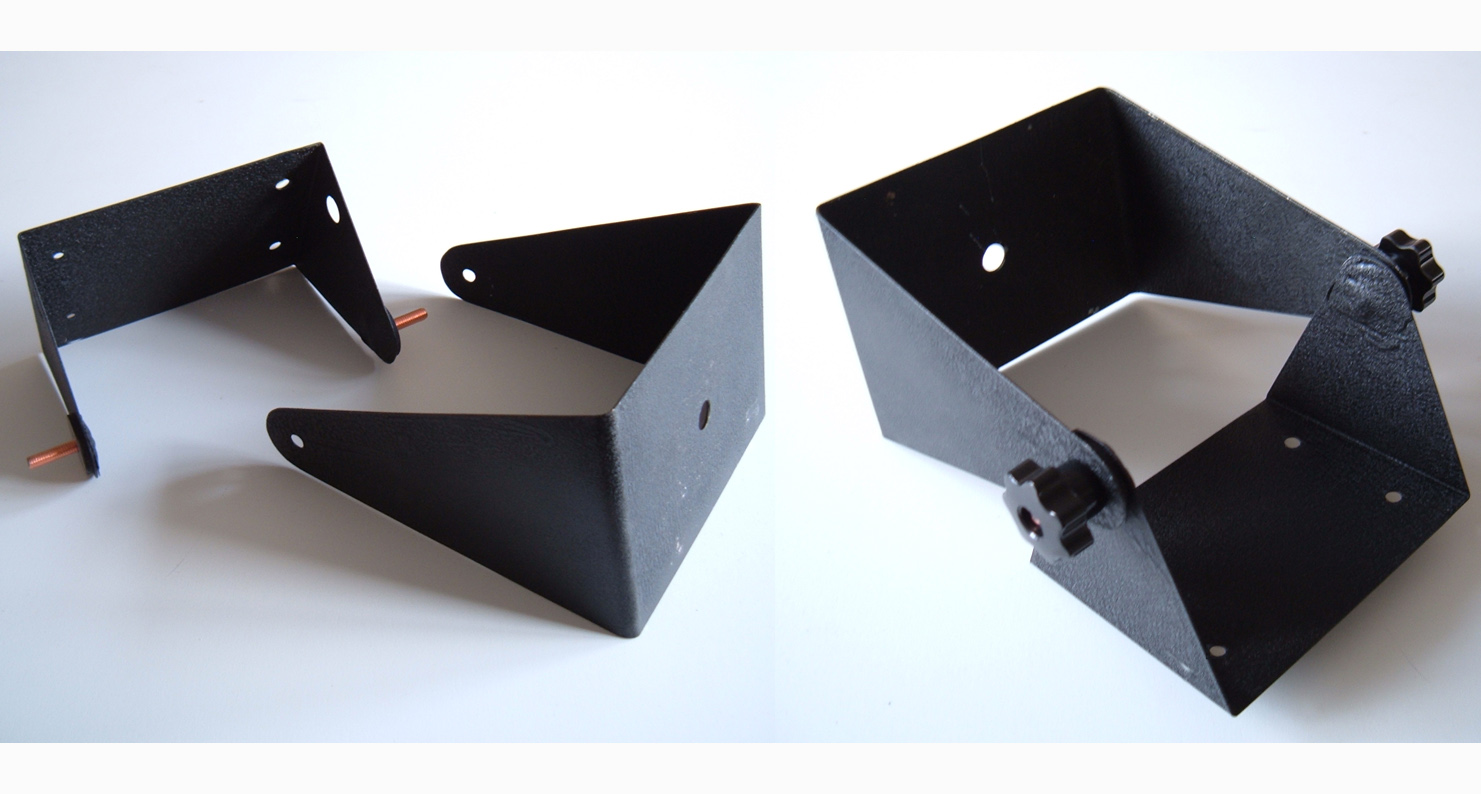 |
 |
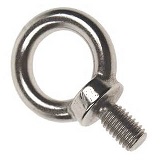
| Above - a typical eyebolt. Two may be fitted if the rear two nutserts near the foott are included | Above the finished bracket |
Above the bracket installed onto a Tutor II |
Copyright © M.Ginda 2022