Karillon DIY Lighting Projects - page1
Here are the first of the DIY lighting projects. More will be added to this section when the documentation is completed. Keep checking back. Also check the folowing pages
|
Effects Wheels can be made quite simply for your projector. Here's the lowdown on making your own 6" effects wheels. You will need a 'blank' wheel (plastic optikinetics 'blank') or two glass circles and a motor boss (either traditional or the new magnetic type). The 'blank' wheel is polycarbonate and suitable for projectors with lamps up to 24v 250w, the Tutor II, Solar 100, Solar 250 are examples of suitable projectors. Other than the glass (should be 1.6mm for the back and 2mm for the spindle side,clear cut to 147mm circle and can be float or heat treated type. 2mm picture glass can be used at a push for both sides) the other parts needed may be obtained from Optifanatics. The rubber ring can also be obtained here (check the website for availability) or as an alternative, use edge protection strip for 4mm glass, obtainable from many good glazier suppliers, cut to length and glue the ends to form a ring. Ok what you need now is some basic information and a creative mind. The projection of the effect happens from only one region of the disk as it rotates past the lens. Therefore when thinking of an image it must fit into this projected 'band' round the wheel. Also if you are using any images that have polarity (a top and a bottom) remember the image is inverted by the lens so the 'top' of the image is toward the outer of the disk. To help you out there is an image below showing the dimentions of the projection area, this is the part of the wheel into which all your image must 'fit'. For paterns and abstract 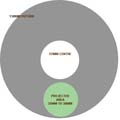 images this is not so important, just cover the whole wheel.So what's next then? Well this is the creative bit. You can create the image directly onto the glass or plastic wheel, or onto a sheet of acetate cut to size and placed between the glass sheets when completed. To make an acetate, the best way is to create your design using some software like 'Photoshop' and print onto acetate or overhead projection film. A colour laser printer is best for this, however reasonable results can be had from an injkjet. For injet prints it may be best to print Two idetical prints and lay them ontop of each other to increase the colour depth, this will only work for bold patterns though. Making an image directly onto glass will require a little preparation and some lightfast clear colour paint medium. Successfull results can be obtained with Glass Paint. You can get this from a host of specialist dealers, do a web search. images this is not so important, just cover the whole wheel.So what's next then? Well this is the creative bit. You can create the image directly onto the glass or plastic wheel, or onto a sheet of acetate cut to size and placed between the glass sheets when completed. To make an acetate, the best way is to create your design using some software like 'Photoshop' and print onto acetate or overhead projection film. A colour laser printer is best for this, however reasonable results can be had from an injkjet. For injet prints it may be best to print Two idetical prints and lay them ontop of each other to increase the colour depth, this will only work for bold patterns though. Making an image directly onto glass will require a little preparation and some lightfast clear colour paint medium. Successfull results can be obtained with Glass Paint. You can get this from a host of specialist dealers, do a web search.
Before you commence painting you must remove all grease and dirt from the glass plate or pastic disk. Use methylated spirit to clean the surface with a suitable cloth. You will be painting onto the 'back' glass (the one without the hub). Test the plastic (in the centre) with your paint to be sure there are no unwanted effects from any solvent content in the paint medium. If you want to 'trace' a picture, lay the glass over your image and simply 'paint over' it. Some good effects can be made by applying colours quite thick and the while still wet, tilt and roll or spin the glass to make the colours merge. The amount of mixing or merging depends on how much paint you apply, and the ammount of force used to make the paint 'run'. When you are satisfied place the glass flat in a warm place to speed drying. Of course you can add more later when it's dry if you want. All done? Now put the two disks together, fit the rubber and attach your new wheel to your projector. Draw curtains, dimm lights, get a beer and watch your new creation in action.
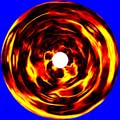
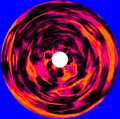
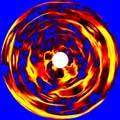
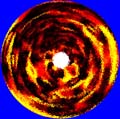
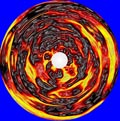
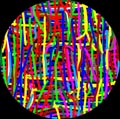
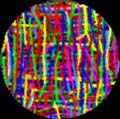
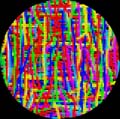
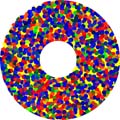
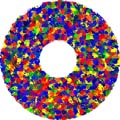
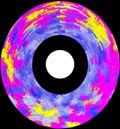
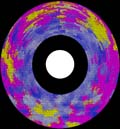
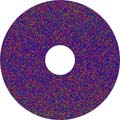
Other types of effect can be created on 6 " glass, and one worth a try is the polarising wheel. This is discussed next. If you want to try some of the above first, there are some sample images on the left of the page to download and print. The image is larger than needed so you must set your print options to print the image 5.85" x 5.85", this is slightly larger than the glass so you can cut the acetate with a craft knife or safety blade to the edge of the glass for a perfect fit.
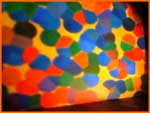
You can download the full set of images full size in a zip file by clicking the zip link below. The last picture shows a finished wheel projected using a Tutor II. Adding distortion wheels or effect lenses will give different effects again!
If you have access to ortho photographic negative sheets, using an enlarger and camera can generate very fine monochrome images with dense blacks and clear detail, this can be hand coloured using bulb laquer or Pebo brand stained glass paints. The skilled among you could create a 'negative' on the glass itself using subbing and emulsion (typically used for silk screen print generation) silk screen printing is also another option if using the correct screen inks. | ||||||||||||||||
...................................... Some sample images to download and print on acetate for 6" effect wheels. Clicking on these will open the image full size in a new window. You then save the full size image.
|
|||||||||||||||||
| Zip 11.7MB | |||||||||||||||||
| . | |||||||||||||||||
| Next Page: Polarising effects wheels | |||||||||||||||||
Return to Section Main Page.. |
|||||||||||||||||
Copyright © M.Ginda 2018

